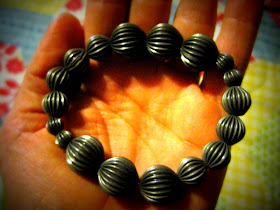
You will need:
~Stretchy Bead String~ Beads of choice
1.
Cut a length of stretchy bead string the size of
your desired bracelet + about 2 inches extra (more if you have trouble working
with small string). So for a 7.5 inch bracelet (pretty standard) but about 9.5
inches.
2.
If you have a Bead Stopper slide it on the end,
if not just tie a knot.
3.
Begin stringing your beads.
Sliding them on the stretchy string in a very
specific pattern or a non-pattern pattern ;)
4.
String them for the length desired (ex: 7.5
inches)
5.
Once you have the beads on tie the ends
together. I usually tie them off about three times. Pull as tight as you can to
make sure the knot holds. Pull the string away from the knot to see if it
grabbed (this is where having extra string can come in handy if you have
trouble holding on. I usually use two sets of my jewelry pliers to really pull
it tight but fingers are fine too).
6.
Cut off the excess string and off you go.
You can use any beads you like, any shape or size or color.
Now go on and give it a try!
Daspri


No comments:
Post a Comment
Sunshine from our friends