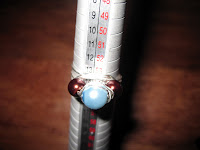
For this you’ll need about 12 inches of 22 gauge dead soft
wire, a bead(s) or brad, a mandrel (or something round slightly larger than
your finger, and some pliers.
1.If you are using a bead(s) feed them into the
center of your wire.
2.Place the beads and wire on the mandrel just below the size you are wanting the finished product to be (i.e. if you are going to make a 7 push it back a bit toward the 8, as you wrap it will get a bit smaller and you don’t want it to be too small). If you are using a brad simply place the wire on the mandrel.
3.Wrap the wire around the mandrel (under the
beads) 1, 2, or 3 times. The more you wrap the wider the band. Standard is one
pass.
4.Then beginning wrapping the wire around the
bead(s). Or if you are using a brad, place the brad in the center and loop each
end of wire around each side and wrap.
5.Wrap around the bead/brad until you have the
look you want using pliers to pull the wire tight.
6.Wrap the remaining wire down the sides of the
ring, if you are using a brad this will actually cover the prongs (make sure to
use your pliers to pull each wrap tight).
7.Once you’ve wrapped the sides to satisfaction
clip the excess and use your pliers to tuck around the edge and make sure it
isn’t poking out. Finished! or
8.You can add other colors and gauges of wire to add interest.
8.You can add other colors and gauges of wire to add interest.
When you’ve gotten the hang of the process each one gets a little easier. Don’t worry if your wire isn’t perfectly smooth or you bend it wrong, that just gives it character. And if you like working with wire start wrapping it on beads for necklaces, earrings, anything!


No comments:
Post a Comment
Sunshine from our friends