Fewh! Well, I’m back in my semi-regular state. The event
I’ve been working so hard on is over and it was a success, in spite of the rain that evening. I was asked to serve again (we did this for the first time last year) as the event coordinator. The organization I
put it together for was happy and the guests we had for the evening were also
pleased. We had 5 artists paint live throughout the evening and we auctioned
their pieces off toward the end of the night, we also had some small painted
canvases that were done by the kids from the Learning Academy that is a part of
the organization. We served hor d'oeuvres and heard a wonderful message from the
director and founder of the organization Phil Fletcher. If you’d like to know
more about City of Hope Outreach checkout our spotlight article here. I wanted
to share a few pics of the evening with you and also a bit of a tutorial on
these really great centerpieces I found.
 |
| This is the closet of goodies I started with! |
 |
| One of our live artists hard at it. Her finished piece was a really pretty cross. |
 |
| Our emcee working the auction. |
 |
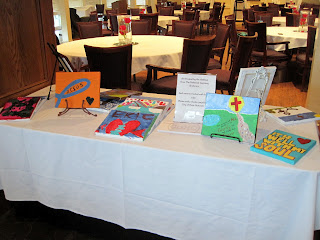
| Art from the children of the Learning Academy |
 |
| My hair was really cute and curly before the rain and humidity hit...so for about 5 minutes! |
We had a great evening and really enjoyed ourselves while raising money for a wonderful cause. Of course as the event organizer I spent most of the evening running around making sure our food service was in order, our artists were well taken care of and our guests were happy. But this year I actually got to sit down for a few minutes and grab a couple bites.
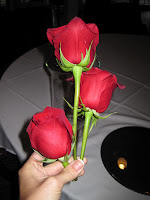
The centerpieces were a big hit, very elegant, and once I figured out how to make them - pretty easy to put together. I found a picture of a version of them online but no tutorial so I had to come up with that on my own based on the picture I found and some research about some floral tricks and my own slant. We got the roses donated, used some of the candles and stones from our centerpieces last year, and borrowed as many of the vases as we could so they really didn’t beat up our budget to bad.
So, I took the roses and cut them to size according to the
vases I had. I used three roses for the bigger vases and one for the smaller
ones. I stacked the ones in the larger vases at different heights to create
more dimension.
I used floral clay to hold the flowers to the base of the
vase but you can also use rocks attached with a rubber band to the base of the
flowers. TIP: floral clay (at least what I used) will not remain stuck to the
vase bottom unless both the vase and clay are dry when you start. Make sure you
form the clay around the flowers so it holds tight when all the water is poured
in around them.
 Oh and I also wanted to share the AWESOME deal I got on the
dress I wore for the evening. I scored it on a sale rack for $9.45 (on sale on
top of being on sale). I know right!!! The pic is from the dressing room at the
store, sorry about the quality but I didn’t get one of the front and back the
night of and this is the only one I had of both which was snapped with a phone.
 |
| Check out my killer deal! |
There are so many things from the evening that I didn't get pics of that I'll have to see if someone else snapped shots of or go back to and do again to share with you. Hope you enjoyed!
And don't forget about the giveaway!
Daspri


No comments:
Post a Comment
Sunshine from our friends