Friday, March 8, 2013

I Heart Vintage Clothing

I really do, I absolutely love (heart) vintage clothing....and vintage fabric, vintage sheets, vintage curtains, vintage dishes, vintage furniture, vintage books, vintage buttons.....
you see where this is going.

Daspri and I got to spend a fabulous Saturday morning last weekend looking through some lovely vintage pieces at a vintage trunk show.

 Rockin some awesome vintage sunglasses
Looking tough in some vintage hats
And we're back....that was really hard not to smile in that last shot!
Isn't this so cute!
My friend Tina of Curio630 does an amazing job finding super cool vintage pieces. She really has an eye for these things. And I think she did a great job with her display too!
Oh, she's totally bringing out more vintage shoes. Time to put the camera down for a minute.
And I'm back because apparently women back in the day had freakishly small feet! Or I could be a tad bit bitter because the shoes were so stinkin cute and.....SMALL! 
Daspri tried on this really cute dress complete with matching "hot pants" to wear underneath. Then we realized why it came with matching hot pants.....HELLO large SLIT!
Me: "Daspri, you could totally wear leggings with this dress and even the hot pants too. It's really cute!"
Daspri: "Jenny, you can see my butt."
Me: "But it's really cute and you can wear leggings."
Daspri: "Jenny, you can see my butt."

Needless to say, the dress didn't make the cut.


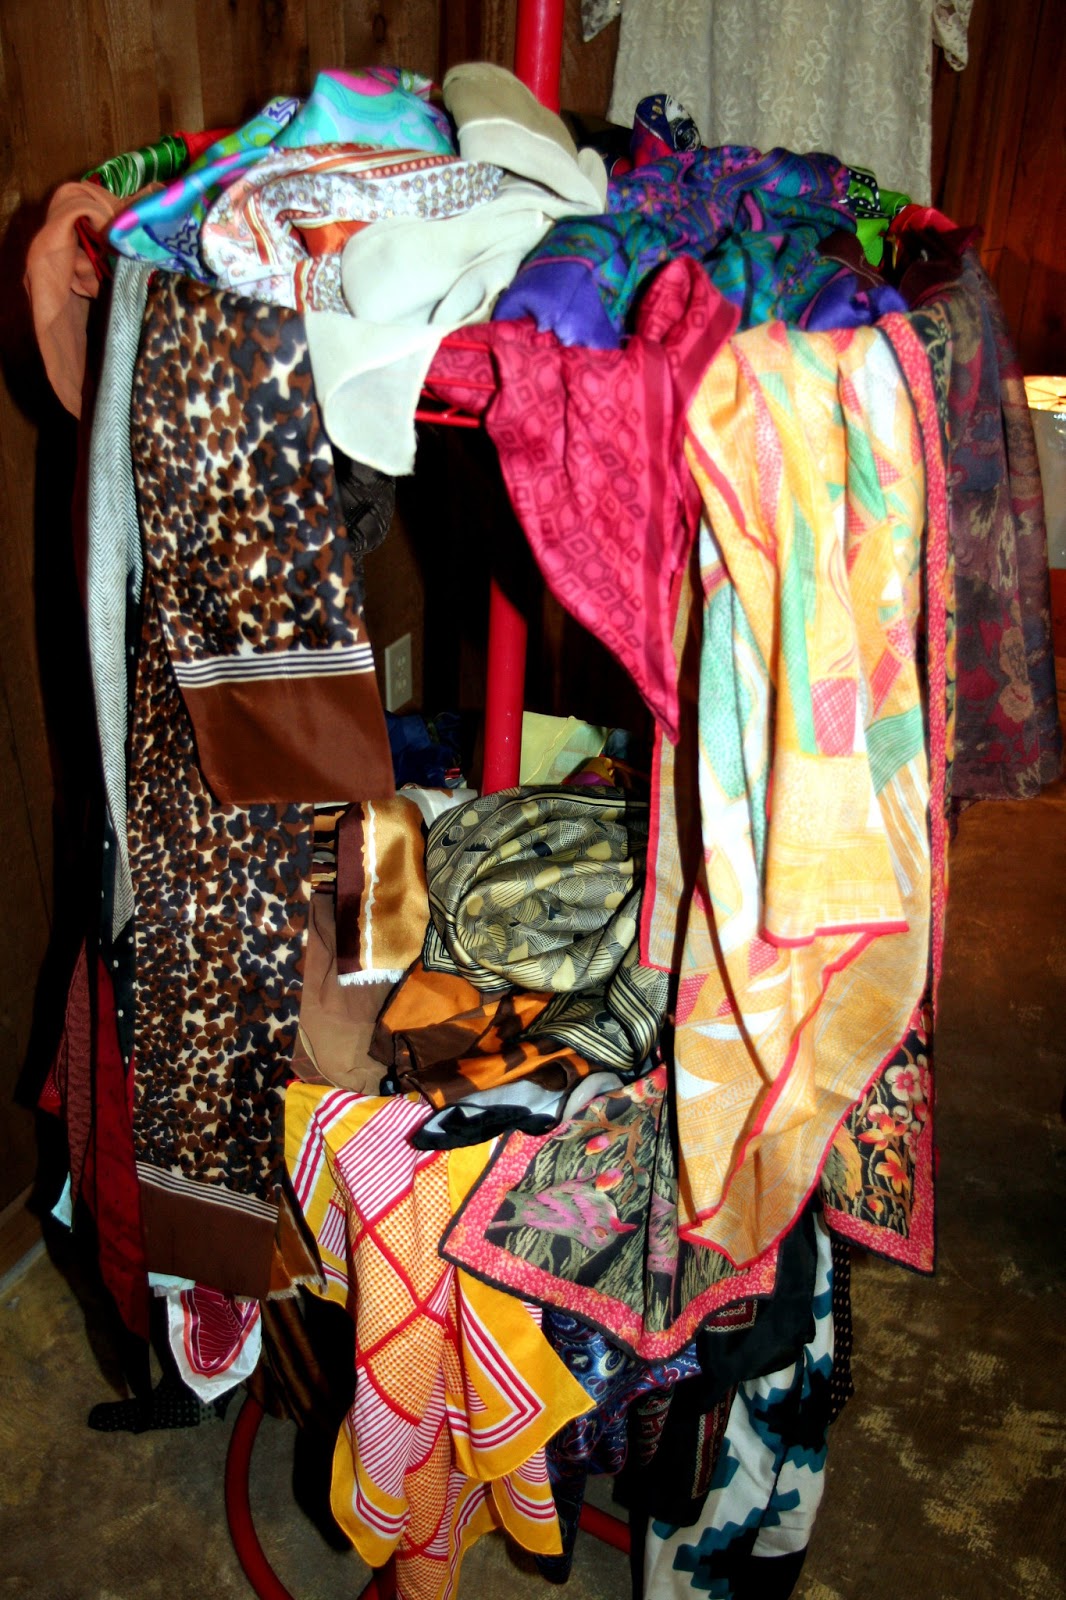
Lovely vintage scarves...we may or may not have purchased a few of these for a fun little DiY in the near future. :)
I love everything about this little nook; the orange chair, the cool light, and the big map on the wall. Not to mention the adorable vintage pillows. I really love those pillows.
Ah, I love this little nook even more now.
Thank you Tina for a lovely morning out, for your fab vintage "eye" and for our lovely vintage finds!
Check out Curio630.

Have a great weekend!
-Jenny


Thursday, March 7, 2013

DiY Wire Wrapped Rings

Wire wrapping jewelry can be a lot of fun and add so much character to your pieces. A simple place to start with wire wrapping is rings.


For this you’ll need about 12 inches of 22 gauge dead soft wire, a bead(s) or brad, a mandrel (or something round slightly larger than your finger, and some pliers.

1.If you are using a bead(s) feed them into the center of your wire.

2.Place the beads and wire on the mandrel just below the size you are wanting the finished product to be (i.e. if you are going to make a 7 push it back a bit toward the 8, as you wrap it will get a bit smaller and you don’t want it to be too small). If you are using a brad simply place the wire on the mandrel.


3.Wrap the wire around the mandrel (under the beads) 1, 2, or 3 times. The more you wrap the wider the band. Standard is one pass.


4.Then beginning wrapping the wire around the bead(s). Or if you are using a brad, place the brad in the center and loop each end of wire around each side and wrap.


5.Wrap around the bead/brad until you have the look you want using pliers to pull the wire tight.

6.Wrap the remaining wire down the sides of the ring, if you are using a brad this will actually cover the prongs (make sure to use your pliers to pull each wrap tight).

7.Once you’ve wrapped the sides to satisfaction clip the excess and use your pliers to tuck around the edge and make sure it isn’t poking out. Finished! or
 
8.You can add other colors and gauges of wire to add interest. 


When you’ve gotten the hang of the process each one gets a little easier. Don’t worry if your wire isn’t perfectly smooth or you bend it wrong, that just gives it character. And if you like working with wire start wrapping it on beads for necklaces, earrings, anything!

Here are a couple fun tutorials to try, no beads or brads required.


Wire wrapped love 

Happy wrapping!
Daspri

Wednesday, March 6, 2013

DiY- Homemade Pure Vanilla Extract

A couple of years ago, my good friend Kim gave me some homemade pure vanilla extract for my birthday. I had no idea that you could make your own!
I mean, most things you can make yourself, but I just never thought about making this myself. Instead, I either bought the super expensive pure vanilla from the store or the cheap, fake stuff (depending on our finances at the time).
When I had finally used all of the batch that she made for me, even then, I still bought the expensive stuff from the store because one of the main ingredients in this recipe is something that we don't typically have on hand.
You can either use vodka (which is what my first batch was made from) or Bourbon. I ran out of vanilla recently and remembered that my husband had won a bottle of Bourbon at a company Christmas party. Woo Hoo, homemade vanilla here I come!

You literally just need these items:
Homemade Pure Vanilla Extract
Vodka or Bourbon
3-6 vanilla beans
glass bottle with tight fitting lid

**UPDATE**
I had an inquiry about how much vodka/bourbon to use. Great question! It really isn't as much about how much vodka/bourbon to use as it is about how many vanilla beans to use.
For the bottle I used, which is probably about 8oz, I used 4 vanilla beans. After placing the vanilla beans in the bottle, you simply pour your vodka/bourbon over them, into the bottle, either almost filling up your bottle or at least covering the the tops of your vanilla beans.
If you want to use a larger bottle and make lots of vanilla, then you will need to use more vanilla beans. Hope this helps!

Pour your vodka or bourbon in your bottle and then place your vanilla beans inside.
The next stop is the hardest one.

Then WAIT!
You will need to set your bottle in a cool, dark place and let us sit for about 2 months before using it. After 2 months, you will have some delicious pure vanilla for all your baking needs, that you made yourself!
And it will last a LONG time, unless you bake a lot. ;)
Most recipes call for using vodka, but I thought I would give Bourbon a try. I think it will give it a really nice, rich flavor. I can't wait to try it.
I'll let you know how it turns out in about 2 months. :)

*I recently read that once your vanilla is done and you begin using it, that you can pour more vodka/bourbon into your bottle as you use it. Not sure, because I have not done this, but I might give it a try this time.

Enjoy!
-Jenny


Tuesday, March 5, 2013

Strawberry Banana Oatmeal Muffins-Gluten, Sugar & Dairy Free

I recently made this recipe and it was a hit. My head was swimming with different ways that we could adjust this recipe to make lots of different yummy muffins.
So, Sunday morning, I tried out strawberry.
And they were delicious!
Check out the link for the original recipe I posted about above or here. Simply follow that recipe and add about a cup of fresh, diced strawberries instead of chocolate chips.
I kept the same additional add-ins as before: unsweetened shredded coconut and chia seeds.

Strawberry Banana Oatmeal Muffins

3 mashed bananas (ripe!)
1 cup vanilla almond milk,
2 eggs,
1 tbsp baking powder,
3 cups oats,
1 tsp vanilla extract,


*I added 2tsp chia seeds, 1/3 cup organic unsweetened shredded coconut, 1 tsp cinnamon, and about a cup of fresh, diced strawberries.
Bake at 380 degrees for about 21 minutes.

Next, I think I'll try an apple crisp version of these!
Enjoy!
-Jenny

DiY Bulletin Board


I love having a spot to quickly tack up things that I want to have an eye on. My desk sits in a tiny hallway between the living room and two of the bedrooms. So, I have to make the most of the space. I’ll probably add a frame or do something to dress mine up later, but I needed to get it back up on the wall with a new coat. For now it’s just plain and functional.


What you’ll need:
Cardboard
Duct Tape
Material
Staple Gun
Nails

1. Cut your cardboard to size (this can be whatever size you would like). Two pieces of the same size layered (this makes it thick enough to keep the tacks out of the wall).
2. Duct tape them together.
3. Lay your cardboard on top of your material and staple it to the back (I found this curtain panel for $0.50 at a flea market but didn’t want to cut it so I just wrapped it up like a present).


4. Flip it pretty side out and nail to the wall.

This project cost me 50 cents!!! I had this bulletin board previously in the same space twice the size. I decided to half it and recover it so reusing all my supplies all I needed was a new piece of material. Of course it goes nicely with my reusable calendar (instructions here).


Daspri

Monday, March 4, 2013

New Finds, New Pieces & New Inspiration

So, Daspri and I got to rummage through some cool vintage clothing and accessories this weekend at a Vintage Clothing Trunk Show. I'll share more details on that later.
However, while we were out, we also got to hit a few flea markets too. Seriously, my kind of Saturday morning!
 I scored this adorable mirrored tray. I fell in love with it right away. I love the delicate detail on the metal but more than anything, it reminds of me of the tray that my grandmother kept in her bathroom. I remember it vividly. She would keep her perfume, lotion and jewelry on this tray.
I have very precious memories of time spent with my grandmother.

 I also went home with these cute little juice glasses. I got 20 of them for $5! I was pretty excited about these because my husband and I just decided to ditch some of the plastic cups and dishes that we had and go glass and porcelain all the way. I much prefer this but when you have small children, you just seem to accumulate all manner of plastic ware.

I have been meaning to share a few glimpses of the new pieces that I made for the local store that sells my handmade jewelry.
A little steam punk love.....
A little vintage velvet love...
A LOT of love.....

I was really happy with this batch of jewelry. I had a blast creating it and I especially had a great time making the packaging this time around too!
Each piece was paired with a unique hand sewn card.

A few pieces were paired with tags like these.
If you are local, you can find all of these pieces at Branch Out.

And now onto the new inspiration....
 Inspiring?
Uh, that's a big fat NO!
This is my "craft studio!"  HA! More like, my craft closet, the kid's art supply closet, old files and tax documents closet and random items that my husband wants to keep closet.
This closet has driven me CRA-ZY for some time now. Mainly, because.....well, look at it!
I have reorganized it several times but because it houses so many different things, it gets messy so fast.
When I create, I usually only have a block of time while the kids are napping or sleeping at night. So, I need my supplies to be very well organized and easy to grab and transfer to the dining room table where everything takes place.
For this to happen, I really need the whole closet for just my supplies.
So, finally....my creative space is in the works! Seriously, I know it's just a closet, but I am super excited about it!

Now that you've seen my "studio"in all it's glory, I am even more inspired to get this project moving and share my finished space with you!
Bring on the new inspiration!!!!

What are you working on right now? What is your inspiration?
I'd love to hear about it.
-Jenny


Friday, March 1, 2013

DiY Baby Boy Diaper Stack

Well, I made those fun onsies yesterday. And as I said, my friend asked for diapers. I didn’t want to just throw the diapers and onsies in a bag or basket so I decided to make a present stack of diapers and onsies instead. Some people would call this I diaper cake, I wasn’t going for that exact look but its definitely similar.


I just took the pack of diapers (40 count), made stacks, and rubber banded them together. I grabbed some ribbon and wrapped a piece around each stack, pinning it together at the front (because it would later be covered). Then I took the onsies and laid them over the bottom layer and pinned the shoulders together. I flipped the stack and pinned them together on the bottom also. I decided the superman shirt should be the focal at the top so I pinned the shirt on the top stack. I tied one ribbon around the entire stack top to bottom to hold it all together. I got this cutie little guitar and shoes to add as the bow at the top and tied them on with ribbon. Finally, I stuffed a little goodie in the toe for momma (a ring she’s had her eye on for a while at a local department store).

Happy Friday and Happy March…spring is coming!!!
Daspri